Acromio-Clavicular (AC) Joint Dislocation Treatment in Bangalore
You know that moment. You fall hard onto your shoulder — a bicycle accident, a slip on wet stairs, or a collision during a game. The pain is immediate and sharp at the top of your shoulder. When you look in the mirror, there’s a bump where your collarbone used to sit flat. Something has clearly moved.
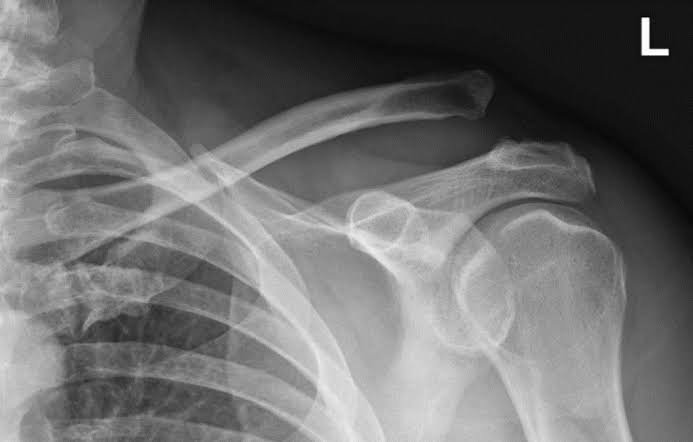
This is what an AC joint dislocation feels like. The acromioclavicular joint — where your collarbone (clavicle) meets the top of your shoulder blade (acromion) — has been pushed out of alignment. The ligaments that normally hold it in place have been stretched or torn, and your collarbone has shifted upward.
It’s one of the most common shoulder injuries, particularly in cyclists, rugby players, and anyone who takes a direct fall onto the point of the shoulder. The good news is that most people recover well — but the journey depends on how severe the dislocation is and, importantly, what you need your shoulder to do in your daily life and sport.
At our clinic in Bangalore, Dr. Raghavendra Kembhavi takes a personalised approach to AC joint dislocation. Some patients need nothing more than a sling, time, and physiotherapy. Others — particularly athletes, manual workers, or those with high-grade injuries — may benefit from surgical stabilisation. The goal is always the same: get your shoulder stable, functional, and ready for whatever you need it to do.
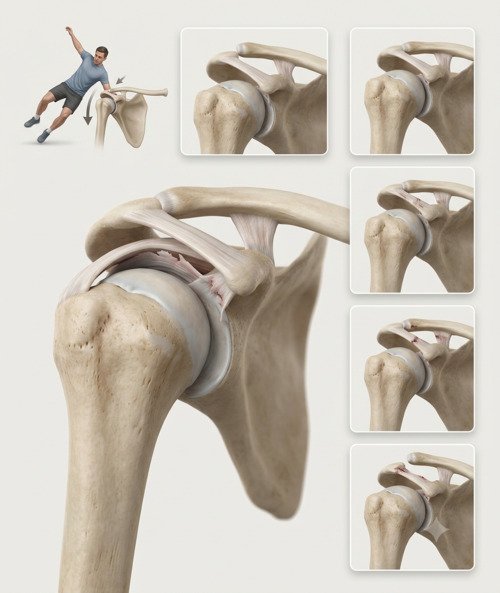
What is the Acromio-Clavicular (AC) joint, and why does it dislocate?
Your AC joint is a small but important joint at the very top of your shoulder. You can feel it as the bony bump where your collarbone meets your shoulder blade. Unlike the main shoulder joint, which is a ball-and-socket, the AC joint is a gliding joint — it allows a small amount of movement as your shoulder blade rotates.
The joint is held together by two main sets of ligaments. The acromioclavicular (AC) ligaments provide horizontal stability, keeping the collarbone from sliding forward or backward. The coracoclavicular (CC) ligaments provide vertical stability, anchoring the collarbone down to the coracoid process of the shoulder blade.
When you fall directly onto your shoulder, the force drives the shoulder blade downward while the collarbone stays relatively fixed. This stretches and tears these ligaments. Depending on how many ligaments are torn and how far the collarbone shifts, the injury is graded from I to VI.
Signs and symptoms
The severity of your symptoms usually matches the grade of your injury. A mild sprain may cause discomfort but no visible deformity. A complete dislocation is obvious — there’s a step-off or bump where the collarbone has ridden up.
Pain at the top of the shoulder
This is the most immediate symptom. It’s sharp and localised, made worse by lifting your arm, reaching across your body, or carrying anything heavy.
A visible bump or step-off
In higher-grade injuries, the collarbone sits noticeably higher than normal. You can often see and feel the difference when comparing to the other shoulder.
Swelling and bruising
The area around the joint may swell, and bruising can appear over the following days.
Difficulty moving the arm
Lifting the arm overhead, reaching behind your back, or even simple tasks like putting on a shirt can be painful and difficult.
Diagnosis
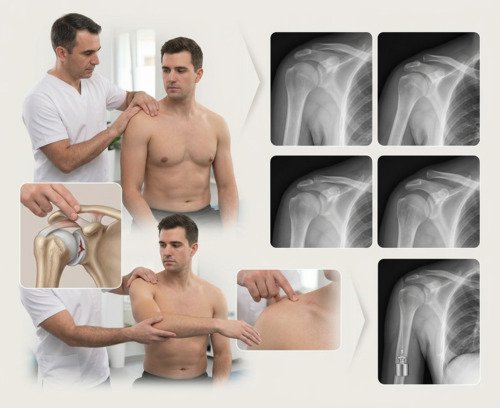
Diagnosing an AC joint dislocation is usually straightforward, but getting the grade right matters for treatment planning. Dr. Kembhavi begins with a detailed history — how the injury happened, where the pain is, and what movements make it worse. A physical examination confirms the diagnosis, and X-rays complete the picture.
Clinical examination
The key finding is tenderness directly over the AC joint. Dr. Kembhavi will also perform specific tests. The cross-body adduction test — bringing your arm across your chest — typically reproduces the pain. In higher-grade injuries, the collarbone may be visibly prominent and can be gently pressed back down, a finding called the “piano key sign.”
Imaging
Standard shoulder X-rays, including a special view called the Zanca view, show the degree of displacement. Comparing the injured side to the normal side helps grade the injury accurately.
Diagnostic injection
In some cases, X-rays taken while holding a weight can reveal instability that isn’t obvious on standard films.
How AC joint arthritis is treated
Step 1
Initial Management
The first priority is pain control and protecting the joint. A sling is provided for comfort, and ice is recommended for the first 48 hours to reduce swelling. Simple pain relief such as paracetamol or anti-inflammatories helps manage the acute phase.
Step 2
Grading and Decision-Making
Based on the examination and X-rays, the injury is graded. Grade I and II injuries are almost always treated without surgery. Grade III is the gray zone — some patients do well without surgery, others don’t. Grades IV, V, and VI usually require surgical stabilisation, especially in active patients.
Step 3
Non-Surgical Rehabilitation
For most low-grade injuries, the sling is used for comfort for one to two weeks, then gradually discontinued. Physiotherapy begins early to prevent stiffness and restore range of motion. Strengthening of the shoulder blade and rotator cuff muscles follows as pain allows.
Step 4
Surgical Stabilisation (if needed)
When surgery is indicated, the goal is to reduce the dislocation and reconstruct the torn ligaments. This can be done using a variety of techniques, including suture-button devices or tendon grafts. Dr. Kembhavi will discuss the most appropriate technique for your specific injury pattern and activity goals.
Step 5
Post-Operative Protection
After surgery, the shoulder is protected in a sling for approximately six weeks. Gentle pendulum exercises begin almost immediately, but active lifting is avoided to allow the reconstruction to heal.
Step 6
Structured Rehabilitation
Physiotherapy progresses through phases — restoring range of motion, then building strength, then sport-specific training. Return to contact sport typically takes four to six months, guided by strength and function rather than time alone.
Recovery Timeline
Recovery from AC joint resection is generally straightforward. The procedure is minimally invasive, and most patients are surprised by how quickly they can return to normal activities.
Weeks 0–6: Protection Phase
The shoulder is protected in a sling. Pendulum exercises and gentle passive range of motion are allowed, but no active lifting, pushing, or pulling. Driving is not permitted while in the sling.
Weeks 6–12: Restoring Movement
The sling is gradually discontinued. Active range of motion exercises begin, progressing toward full movement. Light strengthening with elastic bands starts, focusing on the shoulder blade and rotator cuff.
Weeks 12–18
Strengthening Phase. Progressive resistance exercises build shoulder strength. Wall push-ups and light weights are introduced. End-range stretches help regain any remaining motion.
Week 18 onward: Return to Sport
Sport-specific training begins, including plyometrics and throwing or overhead movements. Return to contact sport is typically allowed between four and six months, once strength and function have been cleared.